Delete image from database and folder using PHP MySQL
In this tutorial you will learn how to delete image from database and from folder?. Here I will explain each and everything in step by step learning method.
We are deleting the image from database and folder together using image id. Every image have unique id, so it’s easy to delete the particular image using id.
Note: - For deleting the image we need to insert image in database. For deleting the image we are using the insert image tutorial table. If you are new user then first see how to upload image in database using mysql? tutorial.
What we are doing in this tutorial?
- For deleting the image we are using insert image tutorial table.
- Creating delete design page delete-design.php.
- Creating delete code page delete-code.php.
- Deleting the image using id.
- Deleting the image from database and folder together.
Step 1.
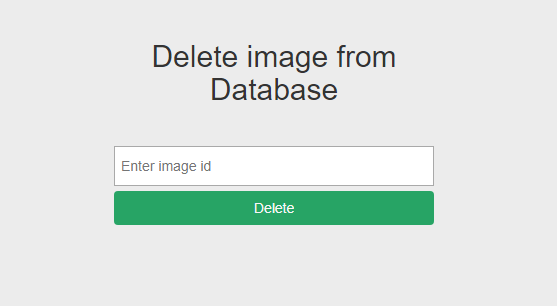
First create the image delete design page to delete the image. Design your page like as a below page. My delete design page name is delete-design.php.
Design your delete page like below.

Copy the below complete HTML code and paste it in delete-design.php page.
	<!DOCTYPE html>
	<html>
	<head>
	<meta charset="utf-8">
	<meta name="viewport" content="width=device-width, intial-scale=1.0"/>
	<link rel="stylesheet" href="https://maxcdn.bootstrapcdn.com/bootstrap/3.3.7/css/bootstrap.min.css">
	<title>Delete Image from Database and Folder - Campuslife</title>
	<style>
		body{background: #ececec;color: #333;}
		.main{text-align: center;margin-top: 20px;}
		.main .login-box{margin-top: 30px;}
		.main .tb{width: 100%; height: 40px; margin-bottom: 5px; padding-left: 5px;}
		.main .file_input{margin-top: 10px;	margin-bottom: 10px;}
		.main .btn{width: 100%;	background: #27a465; color: #f7f7f7;}
		.main .msg{color: #d14269;}
	</style>
	</head>

	<body>
	<!-------------------Main Content------------------------------>
	<div class="container main" >
		<div class="col-sm-4"></div>
		<div class="col-sm-4">
			<h2>Delete image from Database</h2>
			<form method="POST" action="" enctype="multipart/form-data">
				<div class="col-sm-12 login-box">
					<input type="text" placeholder="Enter image id" name="img-id" class="tb" />
					<input type="submit" value="Delete" name="btn_delete" class="btn" />
				</div>
				<div class="col-lg-12">
					<div class="msg">

					</div>
				</div>
			</form>
		</div>
		<div class="col-sm-4"></div>
	</div>
	</body>
	</html>
Step 2.
After completing the designing part now we will create database and table structure. As we know we are using the previous tutorial how to upload image in database using mysql? database and table, so no need to create new database and table. Just follow the previous tutorial section.
If you are new in this tutorial section then see the previous tutorial and use the same database and insert the some images.
Step 3.
I am creating separate connection file so that I can access it anywhere in page. Now create a connection.php file. In this we will add connection information of MySQL so that we can create connection between PHP to MySQL for login.
Why separate connection file?
Because we can call that file in many pages. If we can’t create separate file for connection then we have to write same code in every pages manually. It is good for single or two pages, but not good for 10 or more pages.
Connection file contain below information like (host name, MySQL user name, MySQL password, database name). Change the connection information as your MySQL login information in connection.php file.
	<?php

	$host ="localhost";
	$uname = "root";
	$pwd = '123456';
	$db_name = "campuslife";

        ?>
Now we will use connection.php file in step 4.
Step 4.
Now create an image delete Php page to perform the delete operation to delete the image in table. In Php we will use MySQL delete query with where condition to delete the image using img_id in database. My delete Php page name is delete-code.php.
You can see we have added connection file in delete-code.php page.
Copy the below complete Php image delete code and paste it in delete-code.php page.
	<?php

	/*--- We have created a variables to display error message ------*/
	$error = "";

	if (isset($_POST["btn_delete"]))
	{

		/*-- we included connection files--*/
		include "connection.php";

		$image_id = $_POST["img-id"];

		$result = mysqli_connect($host, $uname, $pwd) or die("Connection error: ". mysqli_error());
		mysqli_select_db($result, $db_name) or die("Could not Connect to Database: ". mysqli_error());
		$res=mysqli_query($result,"SELECT * FROM image_table where img_id = $image_id");
		$row=mysqli_fetch_array($res);

		if($image_id == ""){
			$error = "Please enter the Image id.";
		}
		else
		{
			$result = mysqli_connect($host, $uname, $pwd) or die("Connection error: ". mysqli_error());
			mysqli_select_db($result, $db_name) or die("Could not Connect to Database: ". mysqli_error());
			mysqli_query($result,"delete from image_table where img_id = '" . $image_id ."'") or die("Could not Connect to table: ". mysqli_error());

			//this code will delete image from folder
			unlink($row['img_path']);
			$error = "<p align=center>Image ".$row["img_path"].""."<br /> has been deleted from table.</p>";
		}
	}

	?>
Step 5.
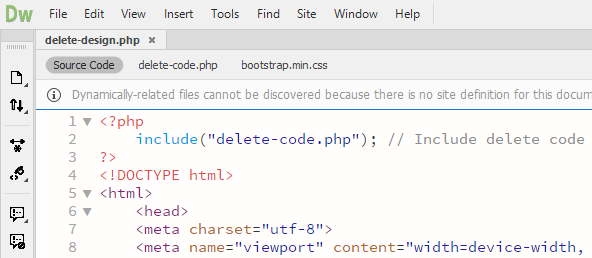
Now add delete-code.php page in delete-design.php page at the top like below. Just copy the below code and paste it in your delete-design.php page at the top.
See the below image for more understanding.
	<?php
		include("delete-code.php"); // Include delete code Script page.
	?>

Step 6.
Now we will show Php success or error message on design page whether image deleted or not in database. So copy the below Php code and paste it in delete-design.php page in between <div class="msg"> ... </div> tag.
	<strong>
		<?php if(isset($error)){echo $error;}?>
	</strong>
	<div class="msg">
		php success or error mesage will come here...
	</div>
Step 7. Output
Now your task has completed and test it on browser. Perform delete operation by entering the image id in textbox.
I hope you enjoyed this tutorial. If you found this tutorial is very helpful then share it with your friends and other’s.
If you have any problem in this tutorial then please watch video.
